
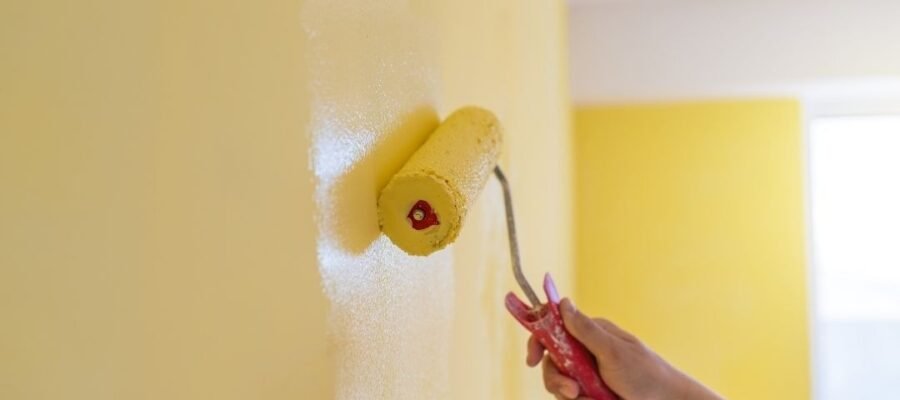
Whether you use a large roller to paint the walls or a small one to paint your furniture, there is a good chance that you can use it better. For newbies, the paint without preparing can be complicated because there are more techniques that we will present to you to avoid traces.
It is obvious that rollers can be very useful painting tools, whatever the project you are attacking. However, you have to do some research before using them. There are many things that can go wrong:
- You can transfer fiber or plush animals to the paint, then on the surface you paint.
- If some parts of the roller sleeve are dry, it is possible to have an irregular blanket in which dry fibers touch the wall.
- If you do not exceed excess paint from the roller and do not distribute it correctly on the walls, you risk seeing the painting that literally runs on the walls.
- If you only perform movements from top to bottom or from one side to the other to spread the paint, you risk obtaining irregular coverage.
- Many types of paint require more than one layer, especially if you try to cover the dark walls with a light color.
But don’t worry, the experience speaking, we will explain how to avoid all these inconveniences. In this guide, we will talk about all the steps to follow to obtain total coverage without traces on the walls.
We will begin by giving you some basic preparation suggestions that you may have already learned in other articles. So we will enter the details of how to obtain a finish without traces after painting the walls on the roller.
Prepare the space to paint
Obviously, the first thing to do is to prepare the room you are about to paint. Basically, you must:
- Remove most of the things in the room and move the largest furniture in the middle of the floor.
- Create a base cleaning, dust and suck the room.
- Cover everything you need to protect from the painting: consult the article whose connection is above for more information.
- Even more important, preparing the walls alone breathe any damage, use a primer, if necessary (for example if you want to cover the dark walls), sand and clean them.
Once everything is ready for paint, you can get the supplies.
Painting tray or paint bucket?
In fact, if you want to use a painting tray while you work, I suggest you take one with cheap plastic sleeves. Believe me, they will save you from having another thing to clean.
On the other hand, if you do not want to use a tray of paint, you can mix the paint in a bucket this method, called “boxing”, allows you to make sure that different pots of paint have the same consistency and the same tone.
However, you just don’t want to immerse yourself a roll in a bucket of paint and apply it on the walls. You can rather get rid of the excess and ensure equal distribution of the paint by moving the roller from top to bottom on a metal grid that you can lower into the bucket.
Start painting the contours
Every time you paint a wall or a ceiling, you have to start painting the perimeter of the surface. Use a synthetic angular brush to paint about 10-15 cm in the corners of the walls and the ceiling. This type of brush is ideal if you are looking for a paint without traces. However, this does not mean that you cannot use other brushes to paint the walls. There is a time and a place for everything. If you want to know which brushes you can use and when, be sure to read my comments on the best brushes for a regular application.
However, the aim of applying the paint on the perimeter of the surface that paints is twofold:
- This gives you a larger room for the maneuver with your roll because you don’t have to approach the surrounding walls, the ceiling and the stick.
- It allows a more homogeneous mixture, but only if the paint that applies on the edges is still a little fresh when it is applied to the roller in the center of the walls.
Once the perimeter painting is applied, you will have to run against the clock. Fortunately, the application of rollers is fast enough.
Dip the roller in the paint
Don’t move! There is still a preparation job to do before you can immerse the roller. First of all, you have to make sure it is clean.
Use an anti-pitched product to remove superfluous fibers from the roller sleeve. If you don’t have one, you can simply use the painter adhesive tape. You can then roll it around the hand with the adhesive towards the outside and use the hand to remove the animal animals.
So you can pass the roll cover under a tap or simply press with a wet towel. It should not drip, but simply be wet, which will allow the roller to load uniformly. Screw your extension and take the paint.
If you use the bucket method I described above, you can pour all the paint and mix it at this stage. Then place the metal grid and dip the roller in the paint, moving it from top to bottom against the grill until you see that the paint has impregnated the entire blanket of the roller. The coating must be loaded but should not flow, so do not immerse it in the bucket.
If you use the method of the paint tray, you can pour part of the paint in the pot at the deepest end of the tank. With a little luck, you will have put a cover of the plastic tray in advance. Once again, do not immerse the entire roll. On the contrary, it gradually penetrates, while moving the roller to the structured part of the plateau.
Use the right rolling method
After loading the paint in your roll, it’s time to apply it. The edges of the wall or ceiling have yet to be humid enough to merge into this new layer of paint. Now you can start painting the wall, using all the paint on the roller and filling it again after covering a section of a large meter.
Every time you immerse your roll in the paint and start a new section, start with a length of the roller from the previous one and immerse yourself so that the two sections overlap. Make sure to spread the paint to avoid thick edges between the sections.
The installation of the painting on the walls is performed in three phases:
- Put the paint. Place the roll loaded on the wall and paint a large shape of W in the section on which you work.
- Distribute the paint. Distribute the paint you have applied in your imaginary section of 2 or 3 feet. These movements can be closer and long oscillations from top to bottom. Go so slowly so as not to overturn the painting.
- Put it. After applying the paint everywhere, make another step with your roll without immersing it in the paint. This method is called “installation” and allows you to obtain the regular finish we were looking for. Start the upper part of the wall and move the roller vertically. Once you reach the bottom of the wall, lift the roller and move it in the middle of its length to the side, then slowly move it upwards and so on.
If you are rather a visual student, you can see how to proceed in this video. From now on, you just have to continue doing things as I described.
Clean the rollers
Most people get rid of the cover of their rollers when they have finished with them. However, I often don’t get rid of things after a single use. However, the roller roofs are washable. You can at least use the same to prepare and paint the walls.
If you’ve always wondered what the circular tooth of these 5 -in -1 racket knives was used for, I will illuminate you. In reality they are destined to clean the roller roofs. It is necessary to keep the knife handle in one hand, place it at the top of the roll, then lower the knife, to strip the paint from the coating.
When you think you have removed as many paint as possible, dip the roller in the water. Remove the metal frame from the roller and wash it separately. Finally, winning the roller’s coverage and let it dry all night.
Latest reflections on the Painted Traces without rollers
We hope to have managed to include some suggestions in this article you didn’t know. As you can see, it is quite easy to get a finish without traces with a roller. You just have to learn some of the best preserved secrets in the profession.
You can therefore say goodbye to fluid paint, unequal coverage and luxurious painting. From now on, your walls will be so fluid that your friends will not believe they have painted them alone.
Ultimas Entradas Publicadas

How to paint a wall without traces (roller)?

Which color in concrete concrete to choose?

Place in the new skull design table

Cement cement texture
How to paint a room: what color and what kind of paint to choose?

Tadelakt in a bathroom: step by step
Art Nouveau Style Decoration

10 contemporary paintings that will make you travel

Tension tables: new creations
